I finally cleaned out my son's closet to free up some hangers for the winter clothes we had just purchased. I threw away a couple of stained t-shirts that I didn't want him to be wearing any more. Went about my business and hopped on Pinterest. I had found a rug that was made out of t-shirts but it was different than the braided rugs I had made in the past. This one was crocheted! I was excited! I went & dug out the shirts from the trash!!!!!
I went and gathered more shirts from my son's closet & set to work. I used 15 large size shirts to make a 23" x 53" crocheted rug using a size 6.5mm hook.
First I cut the sleeves off the shirts to where the body of the shirt did not have any seams. I had used the sleeves of one shirt but it didn't really seem worth it.
I folded the shirt in half length wise. I then used my roller blade knife/pad/ruler to measure and square 1" strips of material all the way up to the neck of the shirt. I discarded the very bottom sewn edge & the neck. I then cut with scissors each of the 1" circle strips to make one long strip. I piled them according to colors (I decided the next time I make a rug, I will use the colors all mixed up and varied). I started with 5 shirts because I was unsure of how many would make the size I wanted.
Then I used my sewing machine to attach each of the strips end on end, leaving 3/8ths of an inch on the seam. Made sure I reinforced my stitch because the shirts stretched & they pulled apart the stitch easily.
Also taught my son how to use the sewing machine. We made quite a pair, I cut most of the time and he sewed as much as he could without stopping to watch the TV.
Once it was my turn to sew I realized it was much more efficient to sew each join continuously rather than cut after each join. So I cut after I sewed the shirts & made a mess of the tangle.
I then made a ball after I sorted out the mess of the shirts. I did realize then it was easier to make a ball of one shirt at a time.
I then crocheted a chain roughly about 65 chains long. I didn't really count them, I just decided : eh! it was long enough. I then added a chain and continued make my round back over my chain skipping the first chain and single crocheting in each of my chains back on down to the end.
Once I got to the other end of the chain, I had to add extra sc's to the end to make it round (the only time you add sc to the end, otherwise the rest of the time, you add a chain stitch). If you don't add extra sc's to the end, you will find your rug is no longer a rug & turning out more like a basket... if you add too much, you will end up with a wavy rug that will not lie flat. There is no way for me to tell you when to add a stitch since some shirts are thicker than others and some are made at different intervals further away from the center.
I made sure I did not add any extra stitches along the length of my rug because I want that part straight.
I then kept going around keeping to the front side, adding a chain stitch in between a set of sc stitches when I got to the ends. I will say that the further you get from the center of the rug, the more sc stitches you will have in your set before you need a chain stitch in between.
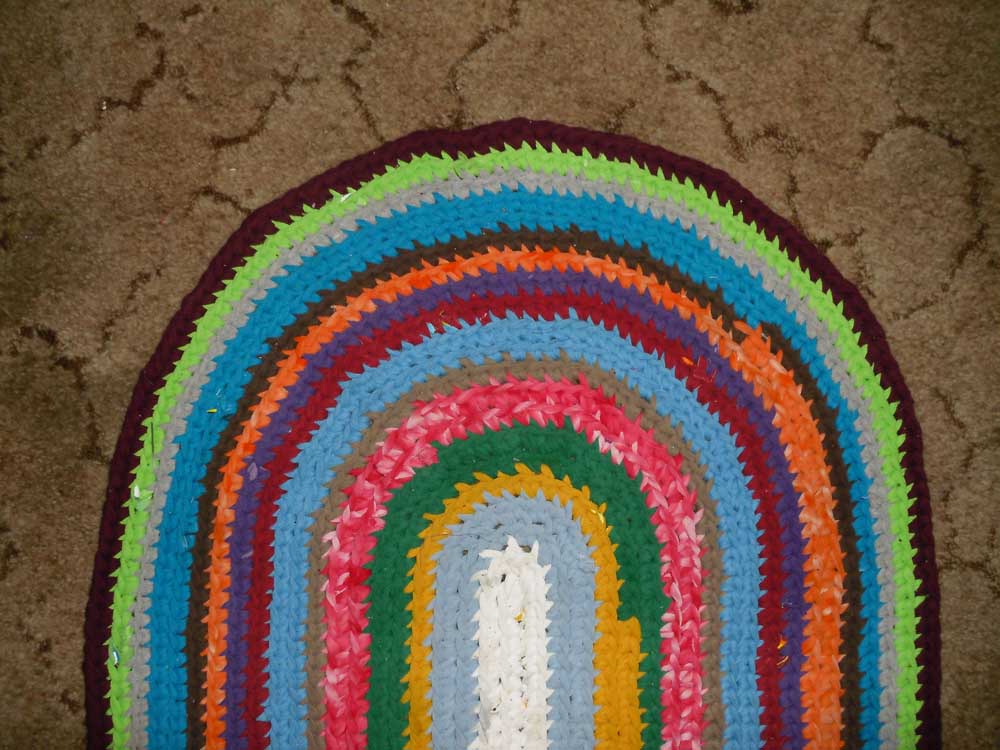
The colored spots on the white is part of the t-shirt that had print on it. The thick print made it a little more difficult to crochet than the rest.

  |
At the end of my 5 shirt ball.
Made more and continued on. |
 |
Timon decided he wanted to help by holding the rug down.
You can see a little wave in this photo up by his front paw where
it didn't naturally lay flat. |
 |
The Front View: The rounded edge. It seemed that every other time I went around is
when I would add the extra chain stitches in between sets of single crochet stitches. |
 |
Back side of the rug: When I got to a join of strips as I was crocheting, I tried
to stretch or shrink the stitches so the join would end up on the
back of the rug and not the front side. Some times it did not work out. The green knot strip
is where I didn't reinforce my sewing and the join came apart. |
 |
Timon even wanted to
help with pictures!
What is it with dogs and rugs...? |


The way you wrote the pattern is so "down to earth" that I say to myself: I can do this. I'm starting a rug this morning with your very helpful tips. Tyvm.
ReplyDeleteThank You! I'll be happy to answer questions you might have. I almost have enough saved for another rug myself.
Delete