
I had the fantastic opportunity to take a class on making a coin purse taught by Ms. Nelda Brown. It was my first sewing class and I loved it! This is for Nelda...
In Memory of my Dearest Friend, Nelda Brown - You'll Always be Remembered!
The instructions in this tutorial belong to Ms. Nelda Brown. The photos and ingredient list belong to me, Paco Rich. Please do not sell this pattern/tutorial. Rather, I wish that you pay-it-forward and teach the next generation how to make a coin purse.

Ingredients:
Four pieces of fabric, about 6" x 6" - two for the outside of the purse and two for the inside lining - they don't have to be different, but for the purpose of this tutorial, I used teal floral for the outside and dark solid blue for the lining.
Four pieces of fusible sheer-weight pellon, about 6" x 6"
Freezer Paper-not wax paper, not parchment paper
Scissors
Iron
Disappearing pen - or a marking tool similar that can be removed
Pencil - used to trace the template onto freezer paper
Sewing Machine
Embroidery Floss - about one yard
Hand Sewing Needle
One Coin Purse Clasp Frame, measuring 3.5" wide x 2" tall - can be found on Amazon, search using keywords, "coin purse clasp", there are quite a few choices - make sure the size is right.
Template printed to size
Pressing cloth
Update: I have since updated the templates for this coin purse pattern. It is recommended you download the file and print directly onto freezer paper. To learn how to print onto freezer paper, follow the general directions for printing onto fusible web - FOUND HERE.
To download the template for the Original Coin Purse pattern, Click HERE. Print 2 copies which will give you the 4 templates needed.
To download the template for the Original Coin Purse pattern, Click HERE. Print 2 copies which will give you the 4 templates needed.
I have also added an elongated version of this Coin Purse.
To download the template for the Long Coin Purse pattern, Click HERE. Print 2 copies which will give you the 4 templates need

 |
Instructions
Using a pressing cloth, press fusible pellon onto the wrong side of each of the fabric pieces, holding down the iron for 10 seconds each time, bumpy side of pellon to the fabric.


Iron freezer paper to all four pieces of fabric, ironing one on the right side of the outside piece and one on the wrong side. Do the same with the inside lining pieces... one on the right side and one on the wrong side.
 |
| I used cotton heat setting on my iron and press for about 2-3 seconds. |
Cut all four pieces out around the freezer paper patterns.
 |
| When you trace your template onto your freezer paper, you do not have to cut your pattern out of the freezer paper until you get to this step. I just happened to be reusing my freezer paper so it was already cut out. |
Mark the dots from the freezer paper onto the wrong side of one outside piece and one lining piece.


Remove the freezer paper patterns. These can be reused several more times, so don't throw them away.


With right sides together, and using a 1/4" seam, sew the outside pieces from the notch to the first dot. Raise the needle and put it back down into the second dot, leaving a space between the dots. Sew across the bottom to the next dot. Raise the needle again and place it into the last dot. Sew to notch. Backstitch at each start and stop.

Repeat with the lining pieces. Clip the threads between each dot.

 |
| See how I did not sew between the two dots? |
Repeat with the lining pieces. Clip the threads between each dot.

Open up the space you left between dots and push the bottom up, matching seams. Fold flaps towards the top of the purse and sew down on the same seam line. This creates pocket space for the coins. Repeat with the lining.

 |
| You can push the flaps toward the bottom of the purse, but I just like the look of it better when they are pushed to the top. |

Clip curves on both the outside and lining pieces.


Turn outside purse right side out and place inside the lining purse, right sides together, matching side seams at the notch.


Sew along the curved top edge where the frame goes, leaving a section unsewn on one side for turning. I like to start sewing on the side I leave unsewn, about 1/2" from the notch seam, sew around the other curve completely, and stop sewing 1/2" to 1" from the start seam on the unsewn side again. Clear as mud???


Reach into the opening, and pull out the outside piece, continue until both lining and outside pieces are right side out.
When you turn right side out, it looks like you have two little purses.

Stuff the lining down into the outside purse. Make sure your seams are all the way inverted.

 |
| If you have a mess like this then you are on the right path. |

Stuff the lining down into the outside purse. Make sure your seams are all the way inverted.

Turn the raw edges of the unsewn curve in 1/4".
Hand-sew it closed using two of the six strands of embroidery floss. This will not show.


 |
| I like to press my seam. |


 |
| I like to hide my thread ends for two reasons. Keeps the tail from going everywhere and you don't make the mistake of trimming too close to the knot and risk having the knot coming untied. Push the needle down between the lining and outside of the purse and out up through the fabric and pull the thread through. Then clip tail close to the fabric. The tail will pull back up into the fabric. |
Matching side seams, find the center of each curved side of your purse. Mark center with pen on both sides.


 |
| I can kinda see my tiny pen mark... |
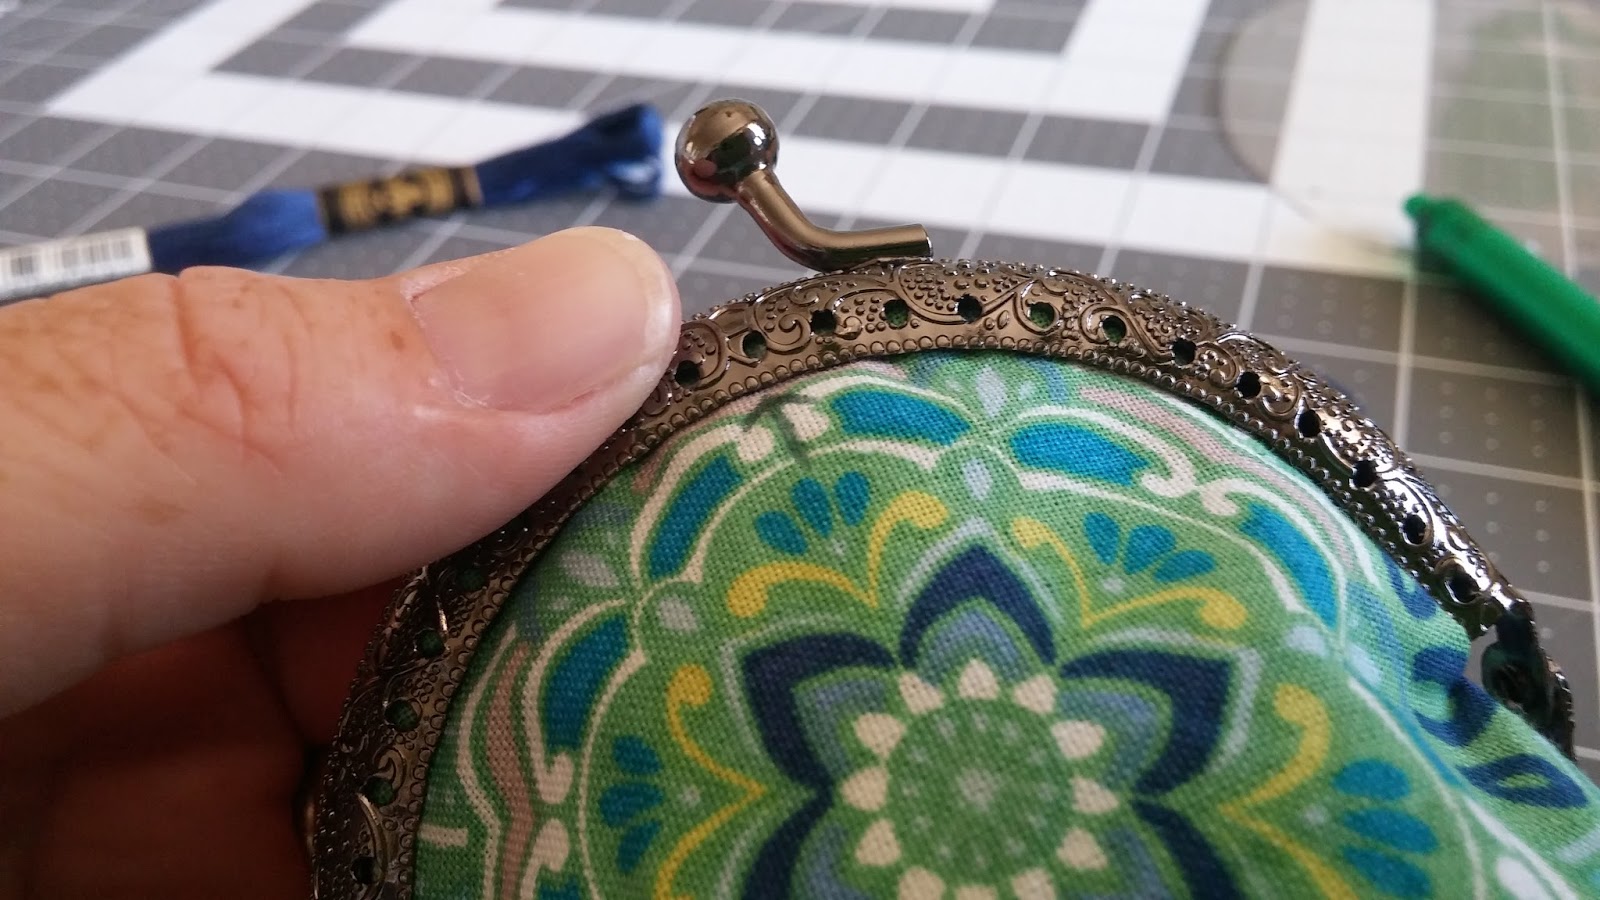
From the bottom side of the purse frame, count up to the twelfth hole. This is the center of your frame. Match marked the center of the purse to that of the marked center of the frame.
Using two strands of embroidery floss, sew with a backstitch from the middle, then down the side, make sure you push the edge of your purse up into the frame as you sew along. Tie off floss when you reach the end and hide tails like pictured above.


Start in the middle again and sew down the other side. Repeat for the other side of the coin purse.

 |
| I drew an arrow for the purpose of this tutorial. Can you see it? |


Start in the middle again and sew down the other side. Repeat for the other side of the coin purse.

 |
| Hopefully, your stitches are prettier than mine. If not, nobody sees it anyway. |
Attach the two jumpers and charm to the frame.

Fill coin purse with coins and enjoy.


 |
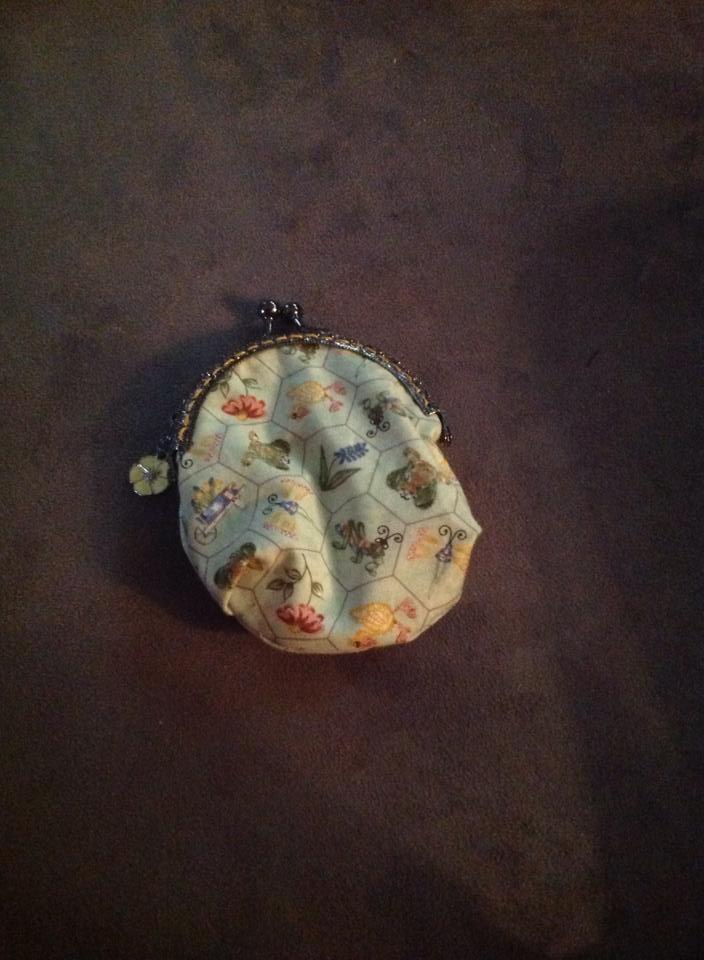
| My two coin purses. |
 |
| My Aunt's coin purse. She wanted to know how to make them so she can teach her grandchildren. |
 |
| My 12 yr old niece, Rachel, and her coin purse. |


The elongated version of the coin purse. Made in August 2020
No comments:
Post a Comment