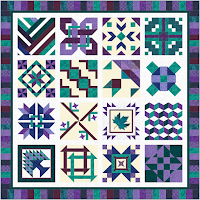
Since we are nearing the end of the sew-along, I have been working on piecing together the blocks and of course, my scrap pile that has been created is HUGE! As I go along, making each block; I do try to use up scraps when they fit, but it doesn't always work out that way.
I had a TON of scraps, I wanted to get as many of them as I could into a piano key border. BUT, I did not want to sit and count the length of my strips. Even I had no idea of how many scraps I had!

I decided the best way, would be to use a Jelly Roll Race (JRR) style of piecing. JRR piecing is when you sew all your strips end to end, fold in half, sew the 2 halves together, then fold in half again and sew the 2 new halves together again. For a JRR, this is repeated for a total of 5 times. Additional help, videos, and tutorials for JRR can be found online.
Let me take you back in time a little bit... This is the quilt my Aunt was working on, the first quilt I used this style of piecing for a piano key border with. She had pieced all the blocks together and needed help finding a layout to tie it all together. I helped her by designing an on point layout with additional blocks to make it larger.
In order to finish off the border with all her scraps, I cut all the strips to the same width, so it made easy work for sewing them all together into one long JRR strip set and then sub cutting them to a certain width. After that, adding them to the sides of the quilt was a piece of cake!
Admittingly, I had some strips left over, which told me I didn't get the best use of the scraps.
And, I didn't want that to happen with this quilt...
I knew I had different widths of my strips. There were quite a few strips that were smaller than 2". I had cut all my scraps into strips. I chose 3 different widths to cut my strips; 2.5", 1.75" and 1.5".Rather than repeating the JRR folding 5 times for my border, I only folded in half 2 or 3 times; so I may have a variety in the placement of my strip set sections when I sew them together. I did not want to trim off triangles, so I did not sew my strips together at an angle, but rather a straight seam (either way you choose, will work with the calculator).
I had all the math figured out and written down on my scratch sheet of paper, but then I had to go and get sick! Thank goodness for antibiotics!!!
Now that I am on the mend, I wasn't going to make the same mistake again - figuring out what to multiply by what addition and division - yeah - even I couldn't understand the pen markings on my paper!
Since then, I have written it up in a spreadsheet with nice descriptions, formulas and all. I thought I would make this available to you for use in your own personal quilting journey. Because this is the best & cheapest method in letting you have access, it is in a Microsoft Excel spreadsheet. Please, if you find any errors, let me know so I can make the changes.
How wide should I / could I go?
For this Calculator to work, you will need to do 2 things first:
- It is best to have the quilt center completed before continuing with adding a piano key border. Also, include the measurement of any additional borders sewn on before you add the piano key border. Knowing the horizontal and vertical measurements of your quilt center is essential in making the calculator work.
- You will need to have your strips cut and sewn into strip sets using the JRR style of piecing.
The information you need is the Finished Height of Strips, Total Number of Inches in the Strip Set Width, AND the Number of Strips in a Strip Set. See Image Below - Click on the image to make it larger.
- You can have up to 3 different Finished Heights of Strips.
Additional Tips for after you use the Calculator:
- Once you have your piano key border cut into strip set sections and have them ready to piece onto the sides of your quilt: sew a basting stitch on each side.
- To do that, set your machine stitch length to 3.0 mm and sew 1/4" away from the edge.
- If it looks like the strip set is "puckering" lower your tension a couple of notches.
- This is to keep your threads from unraveling and to keep the sides from stretching and becoming wavy.
- Your Longarmer will love you for it too!
If you would like to share this quilting calculator with your friends, please give them the link to this page:
https://pjscraftycreations.blogspot.com/2019/02/scrappy-piano-key-border-calculator.html


No comments:
Post a Comment